The CUBE’s On-Board Tech Menu
The on-board tech menu can be accessed by connecting a screen and a USB keyboard to the CUBE. Via the tech menu:
- the network settings of the CUBE can be edited
- proper network operation can be verified, and a variety of network diagnostic tests can be performed.
To access the tech menu, please connect a standard computer screen and a USB keyboard to the CUBE. The CUBE should be on and fully started up. At this point the screen should appear blank.
Press (and release) the TAB key, then type the letters techmenu and within a few seconds, the tech menu should appear.
Note
The tech menu currently requires a QWERTY keyboard. If you are using a different keyboard layout instead, for example the French AZERTY keyboard, then you will likely need to compare your keyboard to a QWERTY layout, and utilize the corresponding keys on your keyboard. As an example, the French AZERTY keyboard has the ?,-key in the same position as the QWERTY M-key, therefore to access the tech menu you would have to type the keys TAB tech,enu on the AZERTY keyboard instead.
Viewing or Changing CUBE Network Settings
The tech menu contains two tabs, the first of which allows the network settings of the CUBE to be viewed or changed.
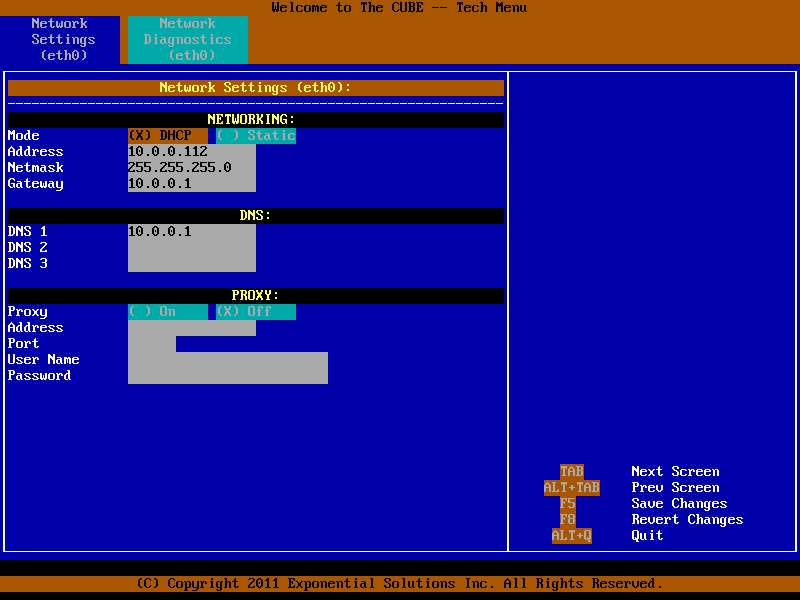
Viewing and setting network settings
Using the arrow keys, one can navigate to the various fields and input specific proxy server settings or static IP configuration.
Note
The selected field is always highlighted in dark orange with a flashing cursor.
To change the network mode between DHCP and Static (or to turn the use of a proxy server on or off), navigate to the appropriate field and press the Enter key or Space bar.
Note
The tech menu will not allow entering of static IP parameters if the network mode is set to DHCP, and likewise will not permit entering proxy information if the proxy setting is off. Also note that User Name / Password authentication for proxies is not yet supported for all types of proxy servers.
If any changes are made, F5 must be pressed to save the changes and have them take effect. (F8 can also be pressed to revert any changes before they have been saved.) A dialogue will be displayed to confirm saving or reverting of the changes. Select Yes or No as appropriate and press the Enter key to accept.
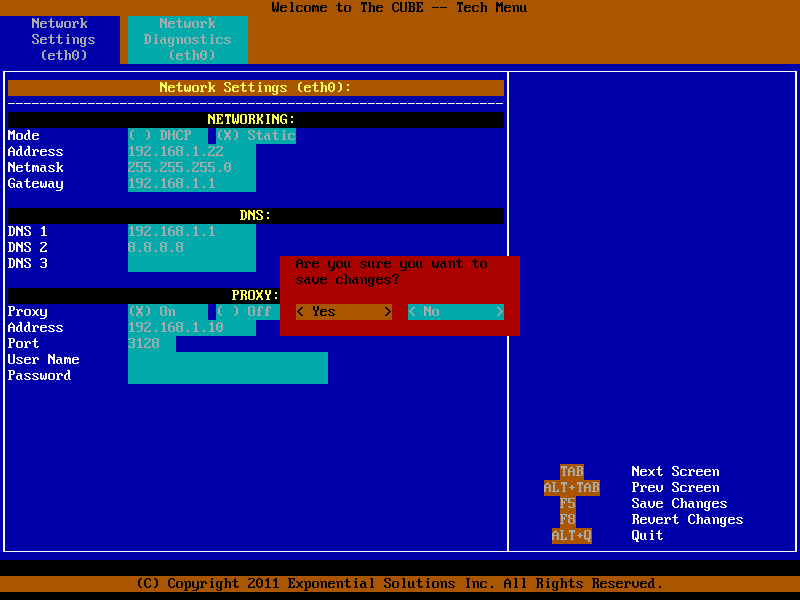
Saving and applying network settings
Note
After saving or reverting changes via F5 or F8 there may be a few seconds during which the tech menu appears to stop responding to further keystrokes, while it waits for the rest of the system to make the appropriate changes. In future this will be enhanced by adding a “Please Wait...” message.
Performing Network Diagnostics
The network diagnostic feature can be used to troubleshoot network issues. In addition, it can also be used by the installer, while still on site, to confirm that the network connectivity is fully operational.
Press the TAB key to navigate to the network diagnostics tab.
Note
If you have made changes on the network settings tab, but have forgotten to save them using F5, the network diagnostics tab will continue performing diagnostics using the older (still active) network settings.
The arrow keys are used to move between different fields on this screen.
An automated diagnostic test can be performed by selecting the Auto field and pressing the Enter key or Space bar. This is the fastest way to verify if the network connection is fully operational.

Auto test with fully operational connection
If an issue is experienced, the automated diagnostic will conduct a variety of additional checks, such as verifying that:
- ethernet linkbeat is present
- the gateway can be pinged
- DNS name lookups can be performed
- the proxy server appears reachable.
It will also provide suggestions to help pinpoint the possible causes of any networking difficulties.
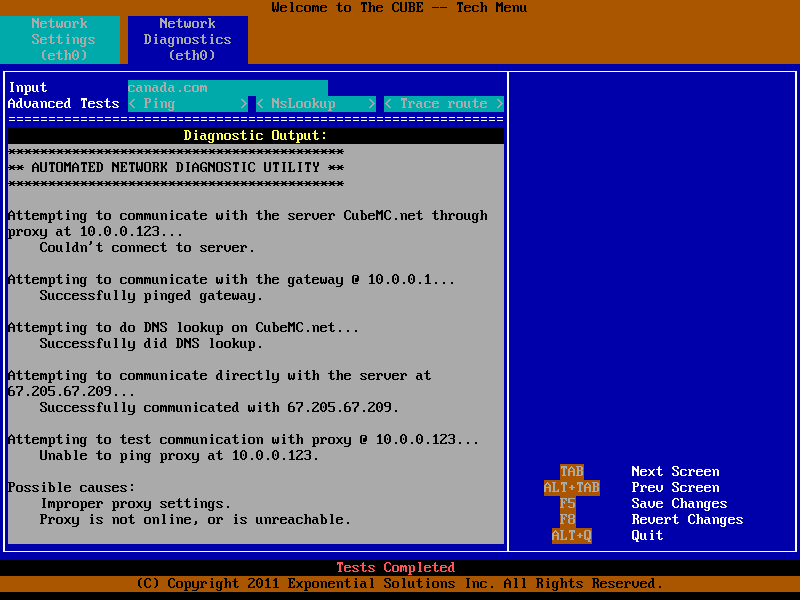
Auto test diagnosing a connection failure
Note
Once the Diagnostic Output panel fills up with output, as illustrated in the above image, it will not scroll automatically. Instead, the down and up arrow keys can be used to scroll through all the diagnostic output and back again. This can be done even while tests are still running.
It is also possible to conduct specific ping, name lookup and traceroute tests. These tests help facilitate advanced network troubleshooting.
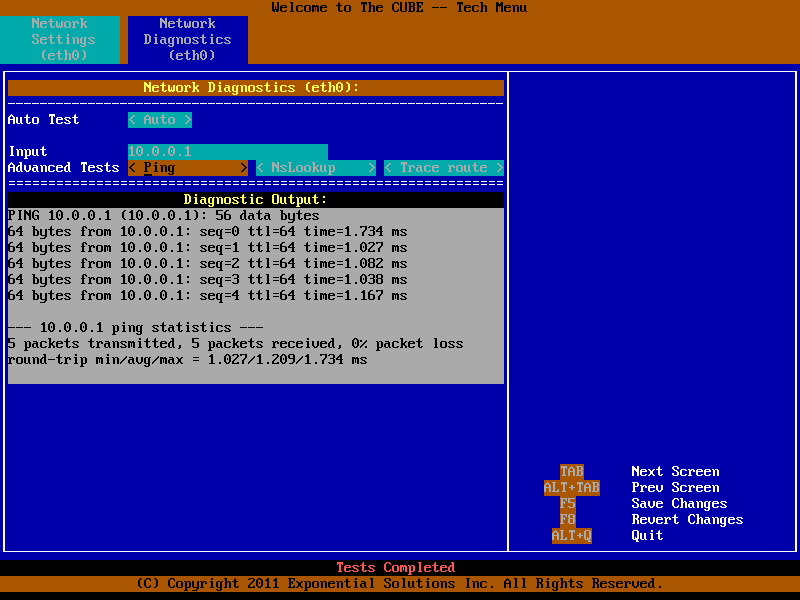
To ping a specific address, input the IP address into the Input field and select Ping
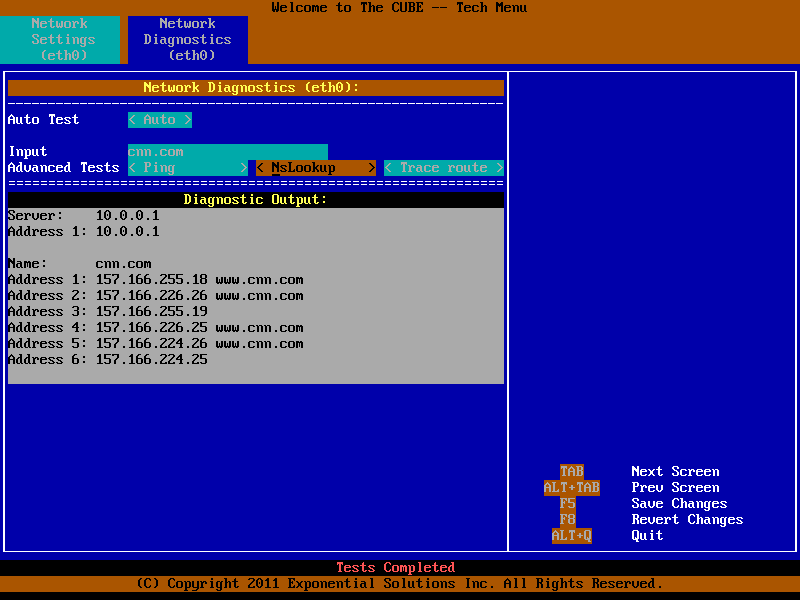
To perform a name lookup, input the domain name into the Input field and select NsLookup
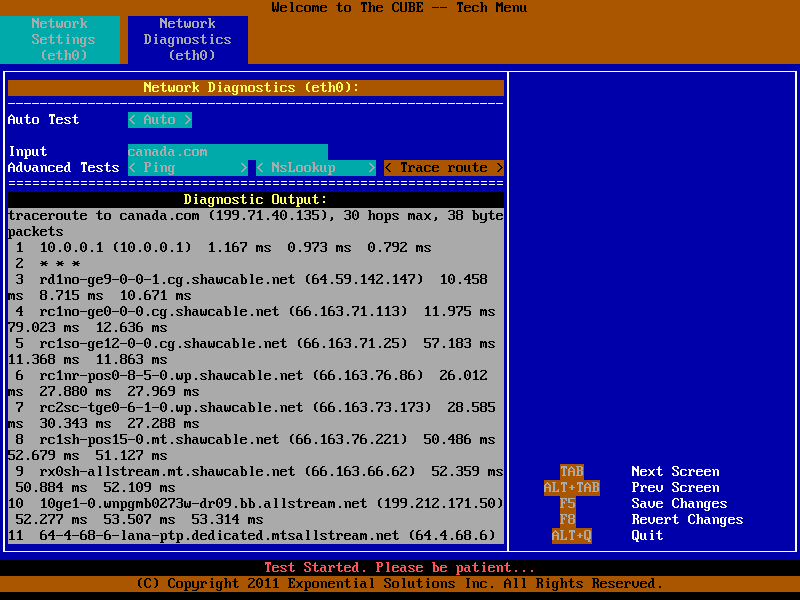
To perform a trace route, input the destination into the Input field and select Trace route
Note
A status line at the bottom of the screen indicates when tests are in progress and when tests have completed.